Introduction to Computer Upgrades
The concept of computer upgrades revolves around enhancing the performance and efficiency of your system by replacing or adding components. As technology progresses, software applications are becoming increasingly resource-intensive, necessitating that users update their hardware to maintain optimal performance levels. Among the most critical components that can be upgraded are Random Access Memory (RAM), Graphics Processing Unit (GPU), and storage devices, all of which play vital roles in overall system functionality.
Upgrading RAM, for instance, can significantly boost a computer’s ability to multitask, allowing for smoother operation when running multiple applications or processing large files. More RAM translates to more available memory for the operating system and applications, which can lead to noticeable improvements in speed and responsiveness. In contrast, a GPU upgrade is essential for users engaged in graphics-heavy tasks, such as gaming or video editing. An upgraded GPU can render graphics more efficiently and enhance visual fidelity, creating a more immersive experience.
Storage upgrades also deserve attention, as they directly impact data access speeds and overall system performance. Solid State Drives (SSDs) have become increasingly popular due to their faster read and write speeds compared to traditional Hard Disk Drives (HDDs). Upgrading to an SSD can dramatically reduce boot times and application loading times, making the entire computing experience more efficient.
In essence, understanding the advantages of upgrading key components is crucial for anyone looking to enhance their computer’s performance. Each upgrade type presents its own set of benefits, ultimately leading to a more responsive, capable, and future-proofed system. As we delve into the specifics of each upgrade category, it will become clear how these enhancements can cater to various user needs and preferences.
Assessing Your Current Setup
Before embarking on any upgrade journey, it is paramount to assess your current computer specifications thoroughly. This assessment will enable you to identify which components may need an upgrade and ensure that your investment will yield optimal performance gains. One of the first steps in this evaluation is to check your installed RAM—Random Access Memory. You can easily do this by accessing the Task Manager in Windows (Ctrl + Shift + Esc), navigating to the “Performance” tab, and clicking on “Memory.” This will provide you with information about the amount of RAM currently in use and its total capacity.
Next in line is evaluating your GPU, or Graphics Processing Unit. A powerful GPU is crucial for tasks involving graphic design, gaming, or video editing. To check your GPU, you can again utilize the Task Manager by clicking on the “Performance” tab and selecting “GPU.” Alternatively, applications like GPU-Z can provide detailed statistics about your graphics card, such as its CUDA cores, memory size, and temperature. Understanding your GPU’s capabilities will help you decide if an upgrade is necessary particularly if you are grappling with performance issues during demanding tasks.
The type of storage—whether it is an HDD (Hard Disk Drive) or an SSD (Solid State Drive)—also plays an essential role in determining your system’s performance. SSDs are generally faster and more reliable compared to traditional HDDs. Tools such as CrystalDiskInfo can help you assess the type of storage currently in use and its health status. Finally, employing benchmarking software such as UserBenchmark or Cinebench can provide a comparative analysis of your system’s overall performance against current standards, allowing you to identify which components exhibit limitations and warrant an upgrade. By conducting this comprehensive evaluation, you can strategically prioritize areas for enhancement within your computer system.
Upgrading RAM: A Step-by-Step Process
Upgrading the Random Access Memory (RAM) of your computer can significantly enhance its performance, especially if you engage in multitasking or gaming. The first step in this process is to determine the type and capacity of RAM that is compatible with your system. It is vital to check the specifications of your motherboard regarding the supported RAM types, such as DDR4, DDR3, or DDR5, along with the maximum capacity it can handle. This information is usually available in the motherboard’s manual or on the manufacturer’s website.
Once you have identified the compatible RAM, the next step involves purchasing the right modules. It is advisable to select modules that match the specifications of your existing RAM or, if you are starting fresh, to purchase a matched pair for optimal performance. Renowned brands such as Corsair, G.Skill, and Crucial offer reliable options. Now that you have acquired the RAM, it is time to proceed with the installation, which is typically a straightforward process.
Begin by turning off your computer and unplugging it from the power source. Next, open the case of your PC. If necessary, consult the manual for instructions on accessing the RAM slots. To install the new RAM, align it with the notches in the slot and push down firmly until the clips snap into place, securing it. After installing the RAM, reassemble your computer.
Upon booting up the system, it is important to optimize the RAM for recognition and performance. Access the BIOS settings during startup and confirm that the new RAM is recognized. Ensure that the memory speed is set to the correct specifications. Once the above steps are complete, you may find that your computer operates efficiently, especially during multitasking activities or high-performance gaming scenarios, showcasing the benefits of an upgraded RAM configuration.
Enhancing Graphics Performance: Upgrading Your GPU
Upgrading your Graphics Processing Unit (GPU) can significantly enhance your computer’s performance, particularly in tasks that demand high graphical fidelity, such as gaming, video editing, and 3D rendering. Modern games and applications often require more powerful GPUs to render complex graphics smoothly, making an upgrade not only beneficial but sometimes essential for an optimal user experience.
When choosing the right GPU, it is crucial to consider your specific needs. For gaming enthusiasts, a high-end GPU will provide the necessary power to deliver high frame rates and stunning visuals at higher resolutions. On the other hand, if your focus lies in graphic design or video production, look for GPUs that offer superior performance in rendering and support for various industry-standard software applications. It is important to identify your primary use case, as different tasks may prioritize distinct performance characteristics.
Another vital aspect of upgrading your GPU is ensuring compatibility with your power supply unit (PSU). High-performance GPUs require adequate power to function optimally, so check the power requirements specified by the GPU manufacturer and compare them to your current PSU specifications. Additionally, be mindful of the physical size of the GPU, as some models may not fit within certain cases. It is recommended to measure your available space and compare it against the GPU dimensions listed in product descriptions.
Thermal management is also an essential factor when integrating a new GPU. As performance increases, so does heat generation, which can impact the longevity and reliability of your hardware. Ensure that your computer case has sufficient airflow to keep the GPU cool. Consider installing additional case fans or utilizing GPU models with efficient cooling solutions to mitigate thermal issues. By addressing power supply compatibility and thermal concerns, you can maximize the performance potential of your upgraded graphics card.
Storage Solutions: HDD vs. SSD Upgrades
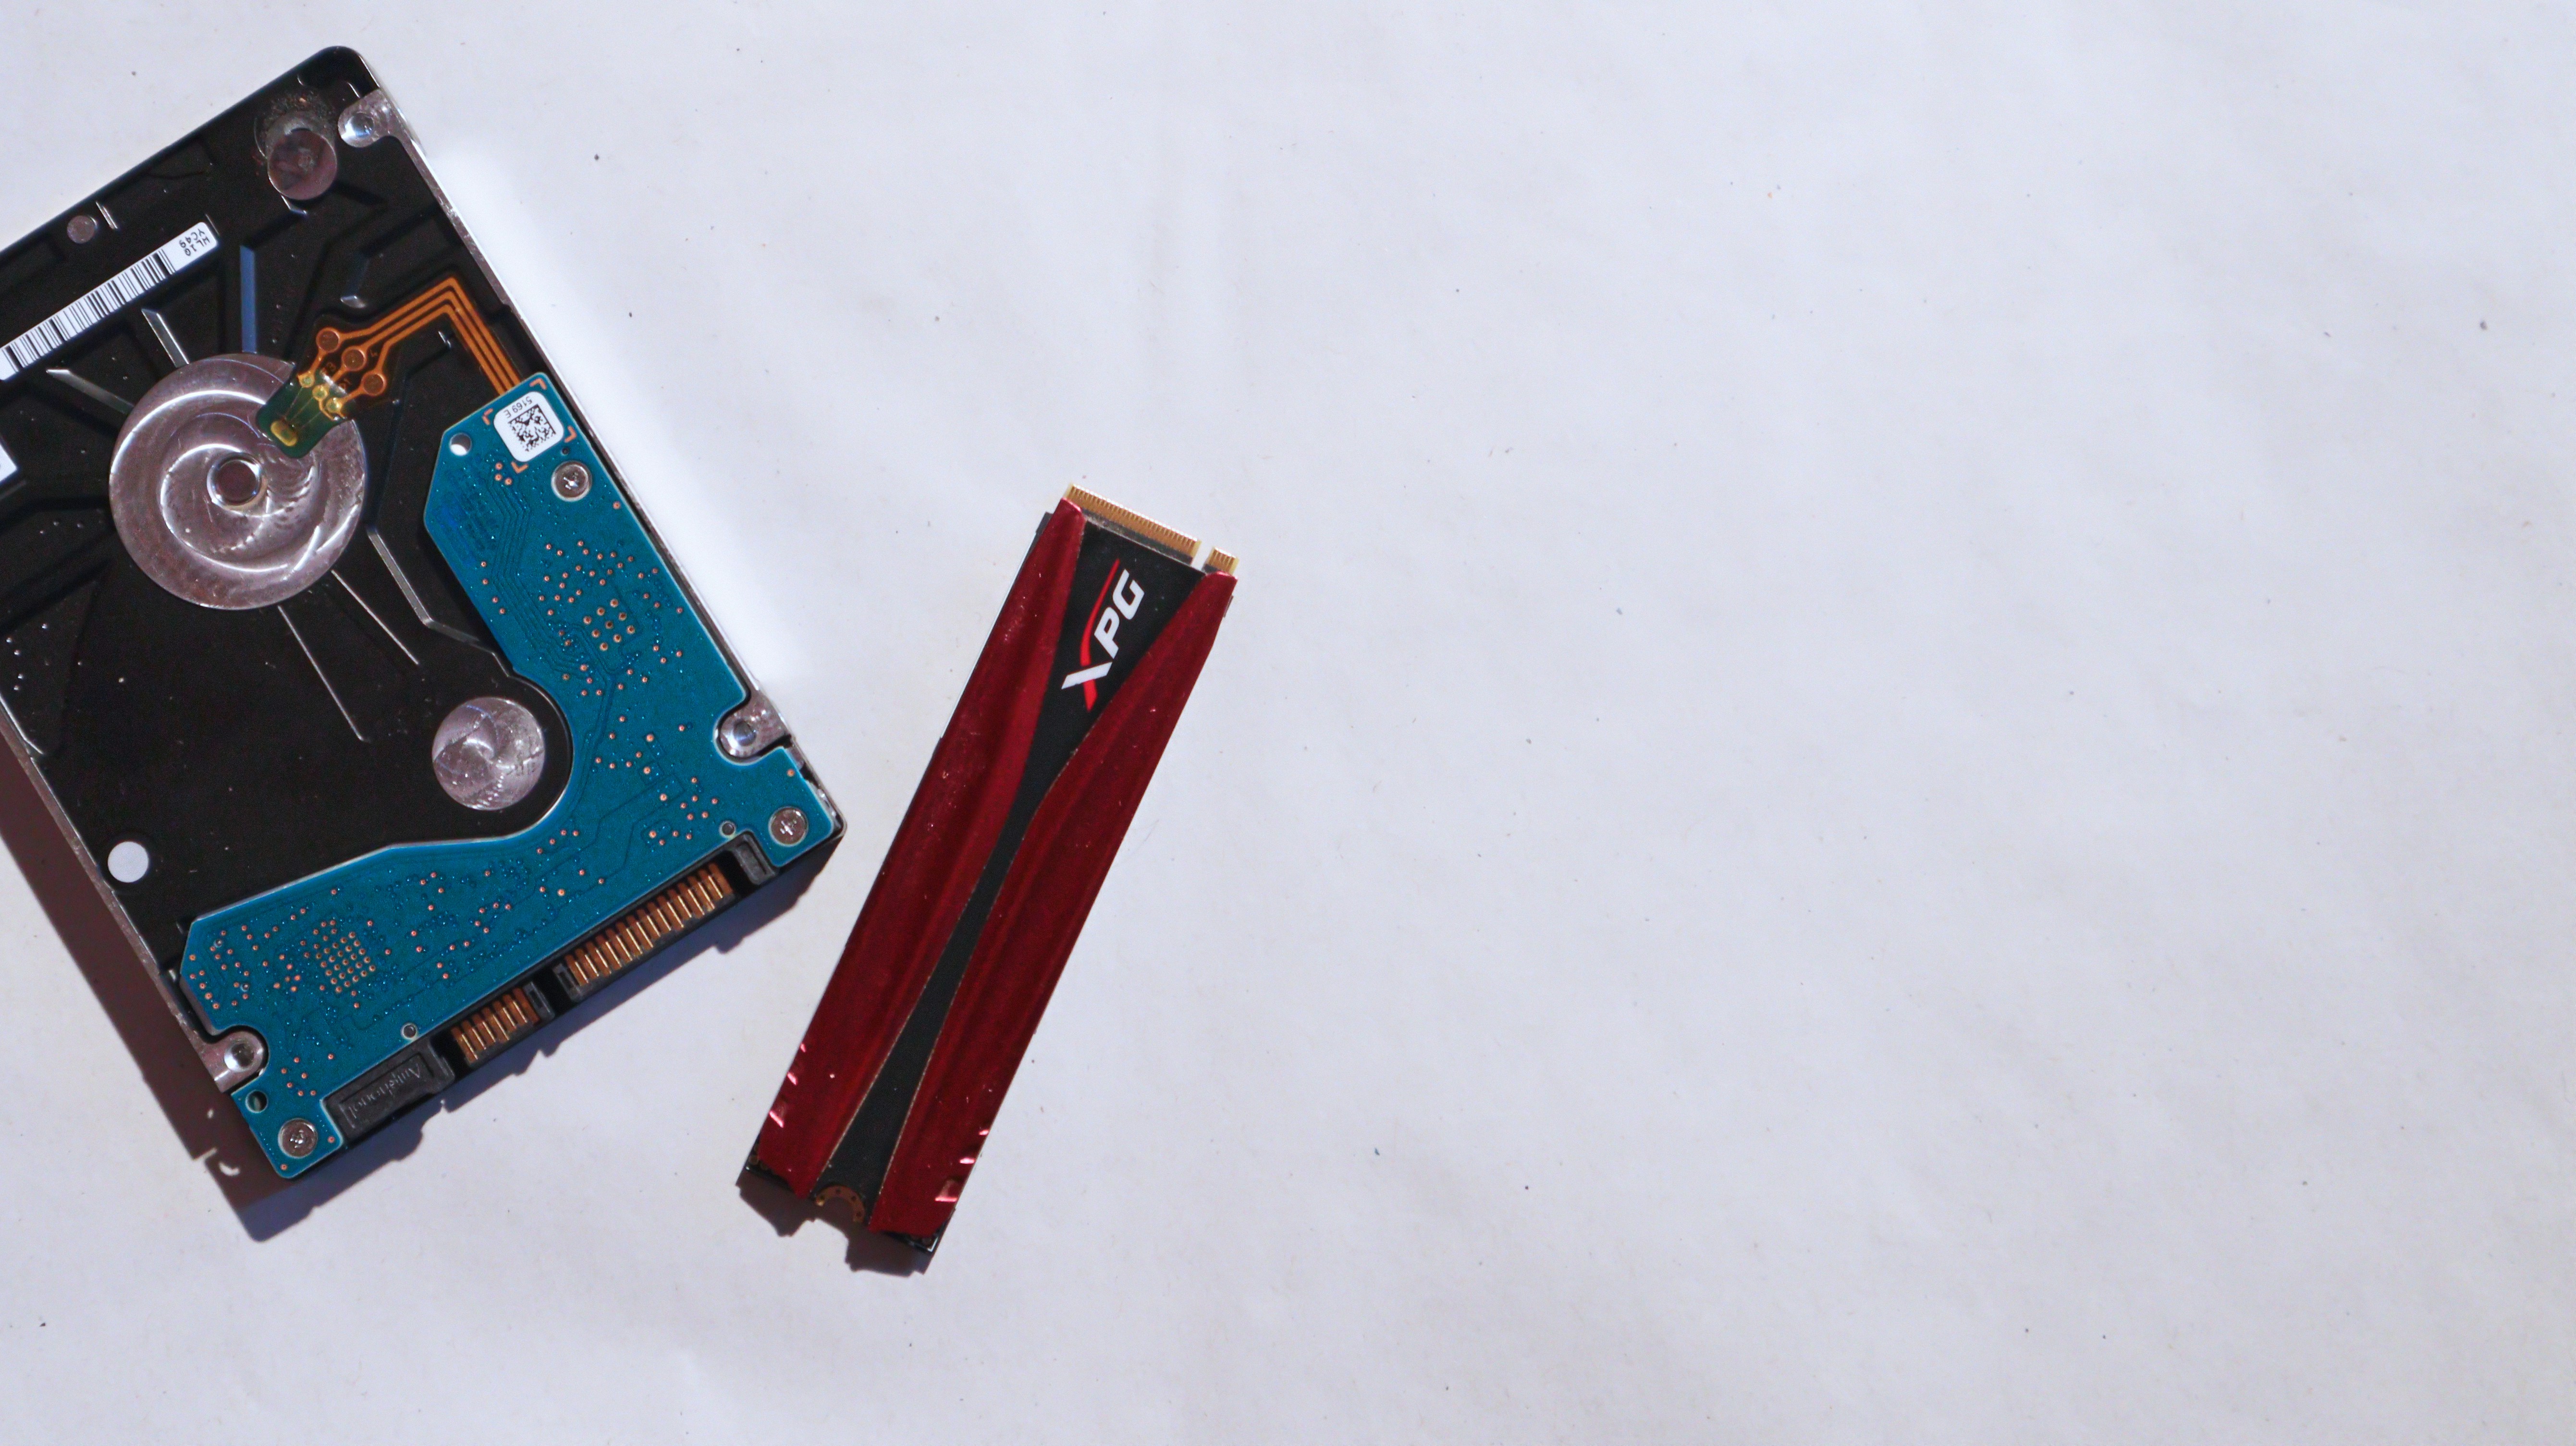
When considering an upgrade to your computer’s storage, it is essential to understand the differences between Hard Disk Drives (HDDs) and Solid State Drives (SSDs). While HDDs have been the traditional storage choice for many years, SSDs have rapidly gained popularity due to their superior performance characteristics. One of the primary distinctions lies in speed; SSDs can read and write data much faster than their HDD counterparts. This speed translates into significantly quicker boot times and faster load times for applications and games, providing a smoother overall user experience.
In terms of longevity, SSDs also tend to outperform HDDs. The absence of moving parts in SSDs means they are less susceptible to mechanical failures. In contrast, HDDs rely on spinning disks and read/write heads, which can wear out over time, resulting in potential data loss. Moreover, SSDs consume less power, generate less heat, and operate silently, making them an ideal choice not only for performance enthusiasts but also for those seeking a more energy-efficient solution.
If you decide to upgrade to an SSD, the process is relatively straightforward. Begin by assessing your current storage setup and determining whether you wish to replace your existing HDD or add an SSD alongside it. Ensure your computer is powered down and unplugged. Depending on your system, you may need to remove the side panel of your computer case to access the drives. For a typical SSD installation, you will connect the SSD to the appropriate SATA port on the motherboard and secure it in place. If cloning your existing drive’s data to the SSD, suitable software will assist in this task. Once the installation is complete, boot up your system, configure your operating system to recognize the new drive, and you’ll immediately benefit from enhanced speed and efficiency.
Cooling Upgrades: Keeping Your System Cool
Effective cooling solutions are crucial for maintaining optimal temperatures during performance-heavy tasks, such as gaming or rendering, which can generate significant heat within a computer system. When the internal components, including the CPU and GPU, operate at high temperatures, they can throttle performance or, in extreme cases, sustain irreversible damage. Hence, upgrading your cooling system can enhance performance, longevity, and reliability.
There are two primary types of cooling systems: air cooling and liquid cooling. Air coolers typically comprise heatsinks and fans. They are straightforward to install, relatively low-cost, and generally sufficient for most users. Effective airflow can be achieved by utilizing quality fans and managing cable arrangements to prevent obstruction in the airflow path. Upgrading to larger or more efficient fans can markedly improve heat dissipation, keeping system temperatures in check.
On the other hand, liquid cooling offers superior thermal performance and quiet operation, especially for high-end rigs prone to overheating. Although installation may be more complex and typically requires a higher investment, liquid cooling kits can significantly reduce temperatures. Custom setups can also be designed to suit specific needs, but they demand more expertise and maintenance, such as refilling coolant and checking for leaks.
Regardless of the cooling method you choose, regular maintenance is imperative. Dust buildup can hinder airflow and insulate components, causing increased temperatures. Regularly cleaning fans, heatsinks, and filters ensures efficient operation. For liquid cooling systems, monitoring liquid levels and checking for leaks will prevent unforeseen failures. By implementing these cooling upgrades, you can ensure that your system runs smoothly and efficiently, ultimately enhancing its performance and lifespan.
Powering Your Upgrades: Understanding Power Supply Units
The power supply unit (PSU) serves as the backbone of any computer system, providing electricity to all components and ensuring they function properly. When upgrading your computer, it is essential to consider whether your current PSU can support new components, as they may require additional power. Understanding how to determine the wattage needed for your upgrades is critical in avoiding system instability or even failure.
To start, calculating the total wattage required involves summing the power consumption of all components, including the motherboard, CPU, GPU, RAM, and any additional peripherals. Each component comes with a recommended wattage, and it is advisable to choose a PSU that exceeds this total by at least 20-30% to account for potential power spikes and efficiency losses over time.
In addition to wattage, evaluating the efficiency rating of a PSU is important. Power supply units are often rated by the 80 PLUS certification system, which indicates energy efficiency. Higher efficiency ratings, such as 80 PLUS Gold or Platinum, generally signify that the PSU wastes less energy as heat, leading to better performance and lower electricity bills. An efficient PSU not only ensures stable power delivery but also contributes to the longevity of your components.
Recognizing the signs that an upgrade may be necessary can prevent complications. Common indicators include system instability, random shutdowns, or a failure to power on. If your system struggles to maintain performance under load, it may also imply that the PSU lacks adequate power for new components. Overall, a well-chosen power supply unit is vital for a successful computer upgrade, guaranteeing that every component receives the necessary power to function effectively and maintain system stability.
Post-Upgrade: Testing and Optimization
Once you have successfully upgraded your computer’s components, it is essential to verify that all new parts are functioning correctly and optimally. This process not only ensures system stability but also maximizes the performance of your investments in RAM, GPU, and storage. To begin, conducting tests with benchmarking tools is highly recommended. These applications allow you to measure the performance potential of your upgraded system by providing specific metrics related to speed, graphics output, and overall responsiveness.
Popular benchmarking tools include 3DMark for graphics performance and PassMark to assess processor and memory capabilities. By running these benchmarks before and after your upgrade, you can compare the results and determine how effectively your upgrades have improved your computer’s performance. Additionally, using a tool like Cinebench can help evaluate your CPU and GPU under real-world workloads, giving you a clear picture of how your system performs in various scenarios.
After benchmarking, it is prudent to monitor your system’s performance in real-time. Performance monitoring applications such as MSI Afterburner or HWMonitor provide valuable insights into resource utilization, temperatures, and clock speeds. Keeping an eye on these metrics can help prevent potential issues caused by overheating or improper component functionality.
Finally, adjusting settings within your operating system can further optimize your upgraded setup. For Windows users, settings such as enabling High-Performance mode in the Power Options can lead to noticeable improvements. For those on macOS, managing login items and utilizing Activity Monitor to identify resource-heavy applications can assist in enhancing overall performance.
Troubleshooting Common Upgrade Issues
Upgrading a computer can significantly enhance its performance, but it also comes with potential challenges. After installation, users may encounter several common issues, including compatibility problems, system instability, and unexpected performance drops. These challenges can stem from hardware incompatibilities, software conflicts, or incorrect installation practices.
Compatibility issues often arise when new components, such as RAM or a GPU, are not fully supported by the motherboard or other hardware. To mitigate this, it is crucial to verify that all new components are compatible before initiating the upgrade. Researching specifications and utilizing compatibility checkers can provide clarity on whether specific hardware will work together seamlessly. Moreover, ensuring that the motherboard’s BIOS is up-to-date can sometimes resolve these issues.
System instability, characterized by frequent crashes or unexpected behavior post-upgrade, often indicates a problem with the installed hardware or improperly configured settings. In these cases, reverting to the previous configuration can serve as a temporary solution while further troubleshooting occurs. Checking connections and reseating components can also help identify hardware that may not be properly connected. Additionally, conducting memory tests or utilizing diagnostic software can pinpoint issues attributed to new components.
Performance dips, which may occur after an upgrade, can be frustrating. These can stem from insufficient power supply to new components or failure to install appropriate drivers. Ensuring that the power supply unit (PSU) is rated adequately for the new hardware is essential for preventing performance drops. Furthermore, after upgrading components such as a GPU, it is advisable to install the newest drivers from the manufacturer’s website to optimize the system’s performance.
Lastly, regular maintenance practices, such as cleaning internal hardware and checking for malware or unnecessary background processes, can help maintain peak performance and preemptively resolve potential upgrade issues.
Conclusion: Making the Most of Your Upgraded System
As we conclude our exploration into the essential components of computer upgrades, it is important to reflect on the significance of this journey. Upgrading crucial elements such as RAM, GPU, and storage not only enhances the performance of your machine but also substantially improves usability. Each of these components plays a vital role in the overall functionality of your computer, contributing to a smoother and more efficient user experience.
With upgraded RAM, users often experience faster loading times and improved multitasking capabilities, which are particularly beneficial for tasks that demand significant memory usage, such as gaming or graphic design. Similarly, a new GPU can dramatically alter the visual performance of both gaming and professional applications, allowing for higher resolutions and better frame rates. Additionally, upgrading your storage to SSDs offers considerable speed enhancements over traditional hard drives, resulting in quicker access to files and programs.
However, the journey does not end with your upgrades. Regular maintenance of your upgraded system is crucial for sustaining performance benefits over time. This includes monitoring system updates, ensuring drivers are current, and periodically checking hardware health. Such diligence allows you to maximize the investment made in upgrading your components, leading to longevity in performance and usability.
Encouraging a proactive approach can ensure that you take full advantage of your upgraded system. This vigilance not only keeps your computer running smoothly but also minimizes potential issues that could arise from neglect. By adopting regular check-ins and updates, you can enjoy the enhancements that come with your upgrades well into the future.