
Understanding RAM: What It Is and Why You Need More
Random Access Memory (RAM) is a critical component in personal computers and laptops, serving as short-term memory to temporarily store data that the CPU needs immediate access to. Unlike long-term storage devices such as hard drives or solid-state drives, RAM provides the necessary speed for your system to perform efficiently and responsively. When you run a program or open a file, the data is loaded into RAM to allow for quick retrieval and processing. The performance of your device heavily relies on the amount of available RAM, especially when multitasking or running resource-intensive applications.
One of the primary benefits of having more RAM is improved multitasking capabilities. With increased memory, your computer can handle multiple applications simultaneously without slowing down. For example, if you frequently use a web browser, word processor, and a video editing software at the same time, having sufficient RAM means that your system can keep all these programs active in memory. This reduces the need for the CPU to constantly fetch data from the slower permanent storage, thereby enhancing performance and responsiveness.
Moreover, applications today are increasingly sophisticated and require more memory to function optimally. Graphics-intensive programs such as video games, design software, and data analysis tools often necessitate higher RAM to operate without lag or interruptions. Users who experience frequent delays or sluggishness in their devices may find that upgrading their RAM significantly enhances their overall computing experience. The increase in memory not only speeds up tasks but also extends the lifespan of the device by ensuring it can keep pace with evolving software demands.
In summary, understanding the role of RAM in your computer’s performance is essential for optimizing its functionality. Upgrading RAM is often one of the most effective ways to enhance your device’s speed and user experience, especially for those who regularly engage in multitasking or utilize high-performance applications.
Checking Your Current RAM
Before embarking on the journey of upgrading your RAM, it is crucial to first determine the amount of memory currently installed in your PC or laptop. The process varies slightly between Windows and macOS operating systems but is straightforward in both cases.
For users operating on Windows, begin by accessing the Task Manager. Right-click on the taskbar and select “Task Manager” from the context menu. If the Task Manager opens in a simplified view, click on “More details” to expand it. Navigate to the “Performance” tab and then click on “Memory” in the left sidebar. Here, you will find detailed information regarding your RAM, including the total amount installed, the speed (measured in MHz), and the type (e.g., DDR4). This information is vital as it helps you identify the specifications of RAM you can add to your system.
For macOS users, the process is equally simple. Click on the Apple icon located in the top-left corner of the screen and select “About This Mac.” In the window that appears, you will see an overview of your Mac’s specifications, including the total memory. By clicking on “System Report,” you can delve deeper into the memory specifications, which will provide information about the type, speed, and how many memory slots are in use.
Checking your current RAM is the first step in understanding whether you can improve your device’s performance through an upgrade. Analyze the available memory information carefully, as it directly influences your next decisions regarding RAM compatibility and potential upgrades. Knowing not just how much RAM you have, but also its speed and type, allows for a more informed selection of new memory modules.
Compatibility Matters: Determining the Right RAM for Your Device
When considering an upgrade to your computer’s memory, understanding the various types of RAM and their compatibility with your device is crucial. The most common types of RAM currently in use are DDR3 and DDR4. DDR stands for Double Data Rate, and each version has different specifications that dictate their performance and efficiency. DDR4, for instance, has a higher speed and improved data transfer rates compared to its predecessor, DDR3. Therefore, determining which RAM is compatible with your motherboard or laptop is essential for a successful upgrade.
The first step in assessing compatibility is to check the specifications of your motherboard or laptop. Most devices have documents or specifications sheets available online that detail their memory requirements, including supported RAM types, maximum capacity, and speed. It’s important to note that while DDR3 and DDR4 RAM may appear similar in physical form, they are not interchangeable due to differing pin configurations and voltage requirements. Therefore, using incompatible RAM can lead to operational issues or failures.
Additionally, you should consider the maximum capacity of RAM your motherboard can support. Many motherboards have limitations on the total amount of RAM that can be installed, which directly influences the type of memory you can purchase. For example, if your motherboard supports a maximum of 16GB of RAM, installing 32GB will be ineffective. Lastly, RAM speed is another critical factor that impacts your device’s performance. While higher speed RAM can provide advantages, it is important to ensure that the RAM speed is supported by your motherboard to avoid bottlenecks in performance.
How to Buy RAM: Tips for Selecting the Right One
When considering a RAM upgrade for your PC or laptop, several factors come into play to ensure you make an informed decision. First, it’s essential to determine where to purchase the RAM. Both online retailers and physical stores offer advantages and disadvantages. Online platforms, such as Amazon and Newegg, provide extensive selection, often at competitive prices and with customer reviews to guide your choices. Conversely, physical electronics stores allow you to see the product firsthand and often have knowledgeable staff on hand to answer questions regarding compatibility and specifications.
Next, it’s crucial to consider reputable RAM brands known for quality and reliability. Brands like Corsair, Crucial, Kingston, and G.Skill have established solid reputations within the tech community. When selecting RAM, look for reviews and ratings that highlight the experiences of other users. This insight can be invaluable in determining whether a specific product meets expectations and performs well under various conditions.
An understanding of product specifications is also pivotal when purchasing RAM. Look for key attributes such as the DDR generation (e.g., DDR4, DDR5), capacity (measured in GB), and speed (indicated in MHz). It’s vital to ensure that the RAM you select is compatible with your system’s motherboard and already installed memory modules. Checking your motherboard’s documentation or manufacturer’s website makes it easier to identify compatible RAM options. Additionally, pay attention to latency timings, as they can influence overall system performance. Once you’ve conducted thorough research into these aspects, you will be better equipped to choose the right RAM for your needs, ensuring both value for your money and optimal performance for your setup.
Preparing to Install: Tools and Equipment You Will Need
When it comes to upgrading your computer’s memory, specifically RAM, having the right tools and equipment is essential for a smooth installation process. Before starting, ensure you have all the necessary items readily available. This preparation not only streamlines installation but also promotes safety and efficiency.
Firstly, a quality set of screwdrivers is crucial, particularly a Phillips-head screwdriver, as most computer cases use screws of this type. A flat-head screwdriver may come in handy as well. Depending on your computer or laptop model, you might need different sizes, so thorough preparation is crucial. Additionally, a pair of tweezers can assist in handling small screws or components without risking damage.
Another important item is an anti-static wrist strap. This tool serves to prevent electrostatic discharge (ESD), which can significantly harm sensitive computer components, including RAM. By wearing this wrist strap and securing it to a grounded surface, you mitigate the risk of damaging your new memory sticks during installation.
If your system requires thermal paste, having a small tube on hand can be beneficial, especially for laptops where cooling components may need to be removed. Applying thermal paste correctly is vital to ensure optimal heat dissipation from your hardware.
Creating an anti-static environment is equally important. Work in an area that is free of static electricity; avoiding carpeted rooms and using an anti-static mat can help. It’s advisable to avoid wearing clothing that generates static. Make sure to power off your computer and unplug it from the wall to ensure safety while working on it. Proper precautions will not only protect your new RAM but also extend the overall lifespan of your computer components.
Step-by-Step Guide to Installing RAM in a Desktop PC
Installing RAM in a desktop PC can significantly enhance its performance and multitasking capabilities. This guide aims to assist you through the installation process with clarity and precision, ensuring a smooth upgrade. Before you begin, make sure to turn off the computer and unplug it from the power source to prevent any electrical accidents.
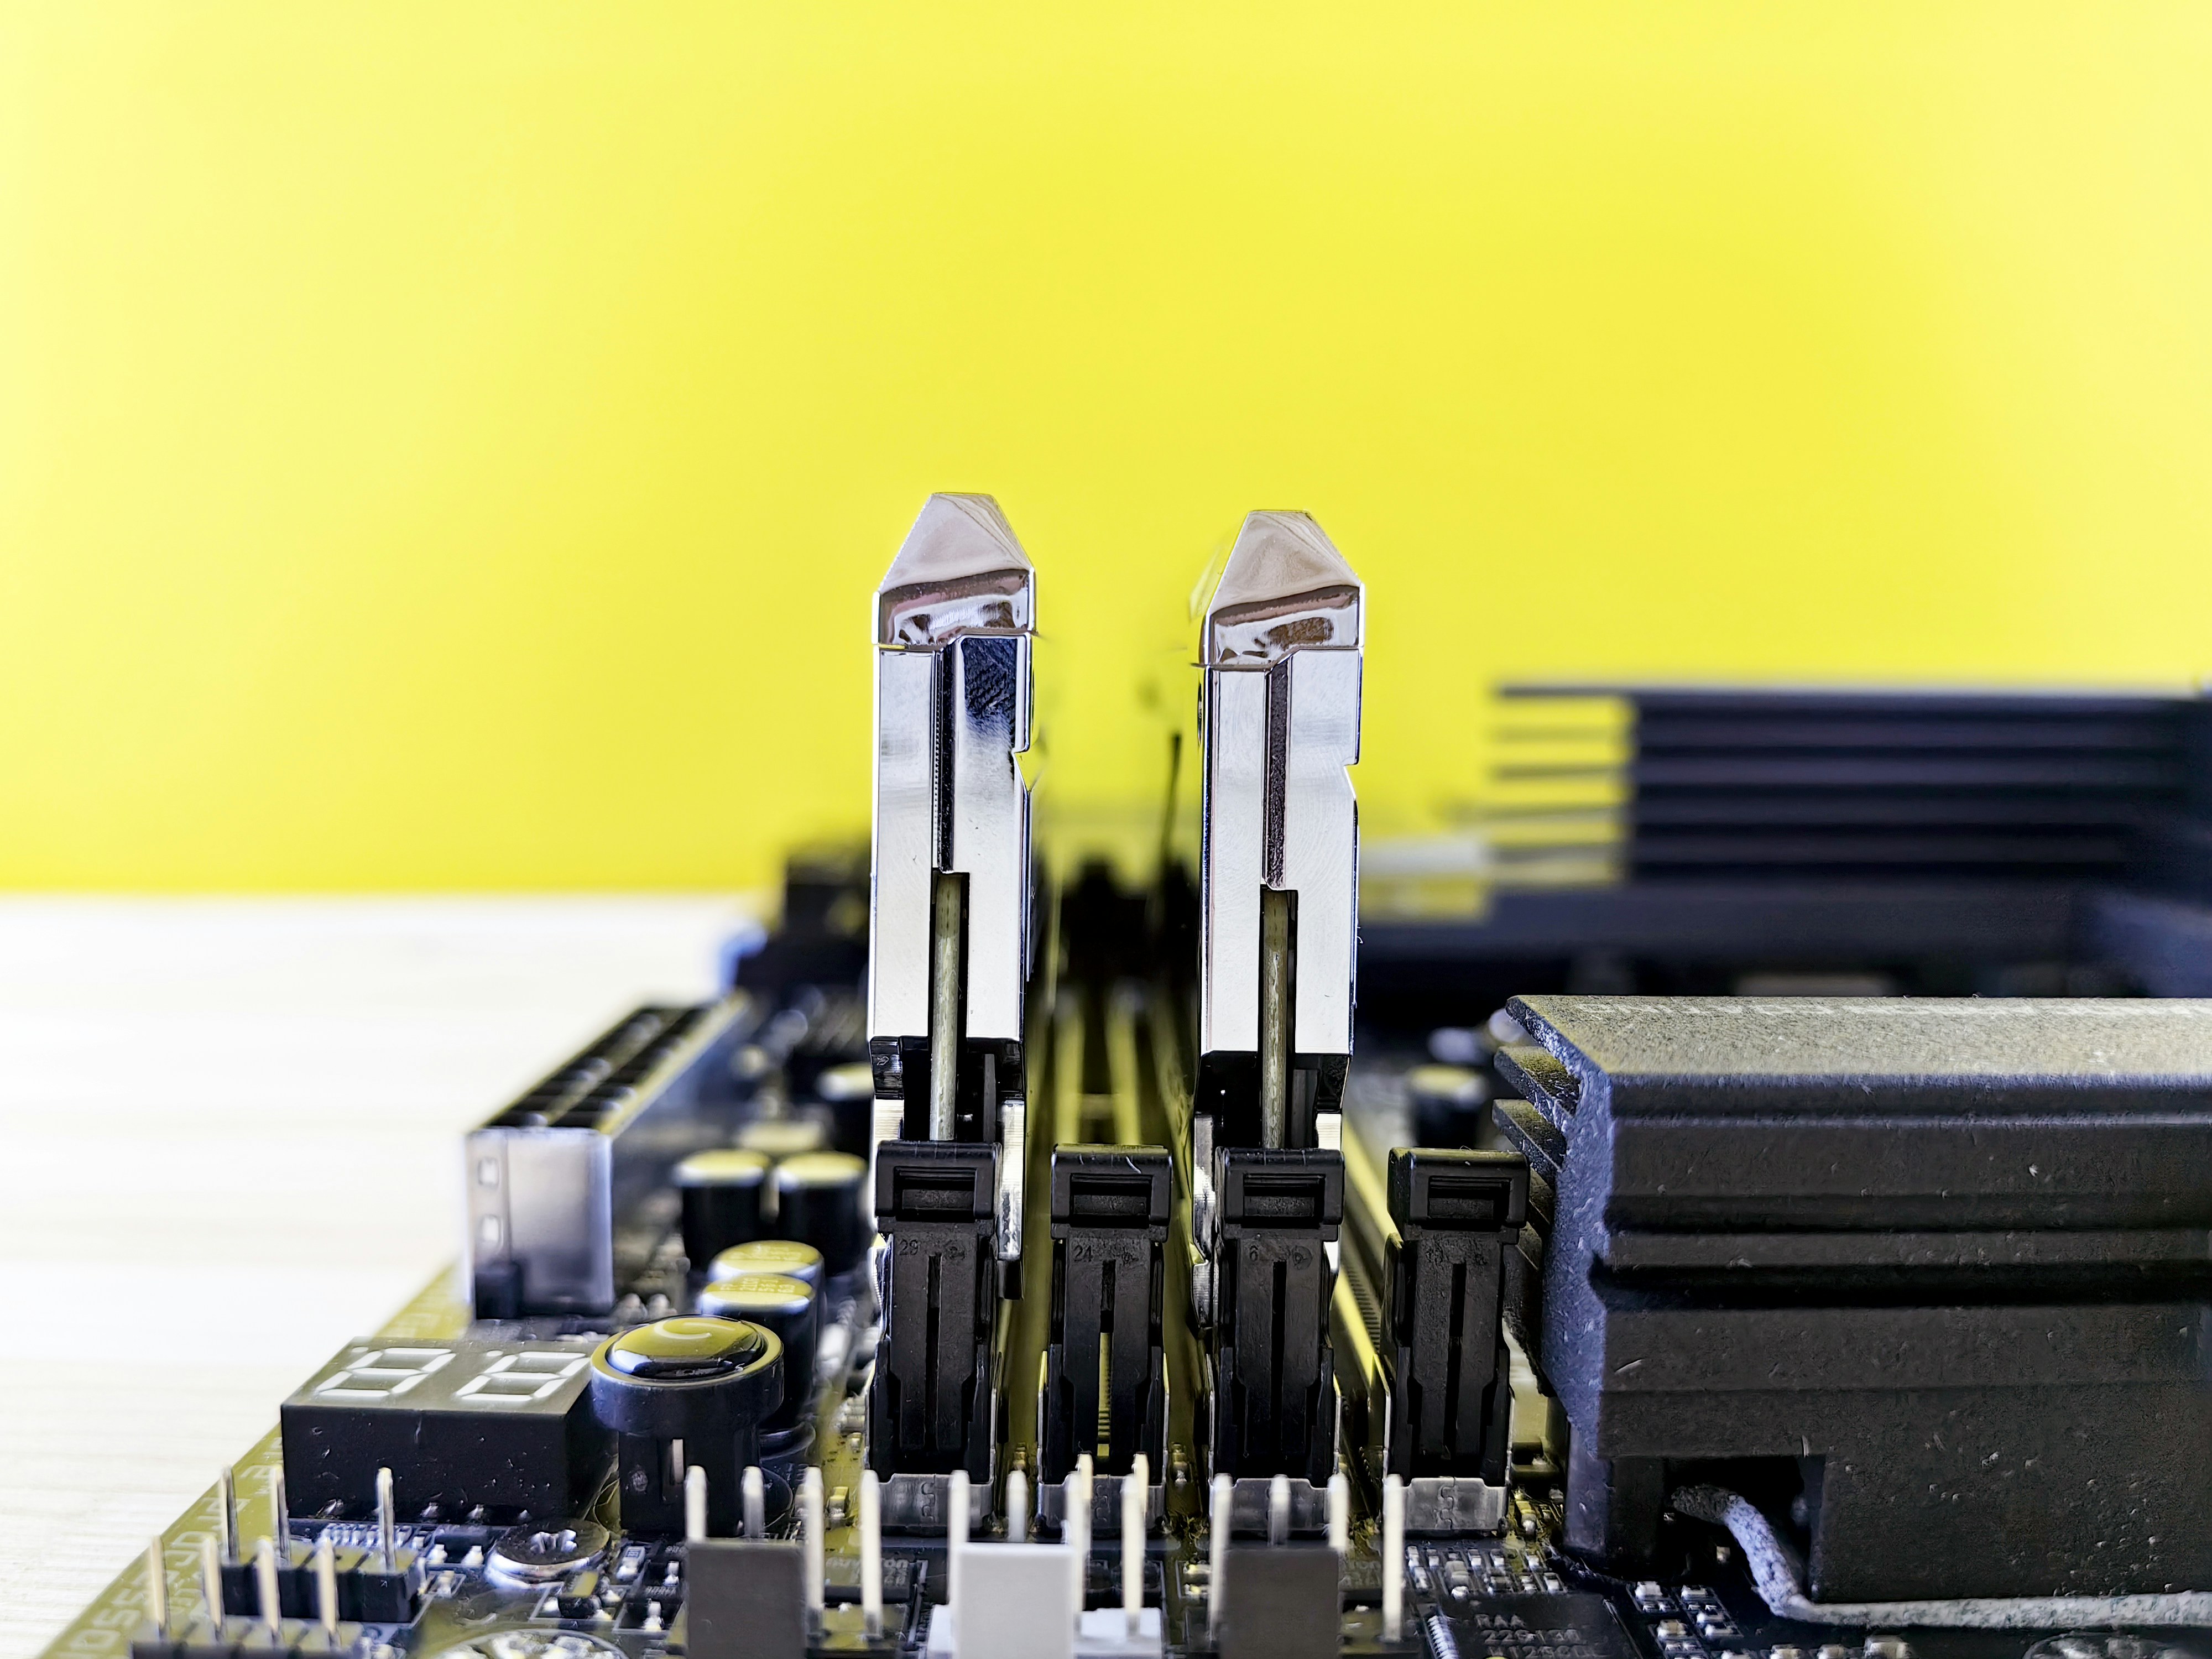
To start, locate the computer case. Most cases have side panels secured with screws or clips. Carefully remove the side panel using a screwdriver or by releasing the clips, which grants you access to the internal components of the desktop. Once open, visually identify the RAM slots. These slots are typically long and situated near the CPU. Depending on your motherboard configuration, you may notice multiple slots, often color-coded to facilitate proper installation.
If your computer already has RAM installed, you may need to remove the existing modules. To do this, gently press down on the clips at either side of the RAM stick until it pops up, allowing you to pull it out of the slot. Ensure you handle the RAM by the edges to avoid any static discharge that could damage the components.
When installing new RAM, align the notch on the RAM stick with the key in the slot. Firmly press down on each end of the RAM until you hear a click, indicating that the RAM is securely seated in the slot. It is crucial to ensure that the RAM sticks are evenly placed in the slots, especially if you are utilizing multiple modules to take advantage of dual-channel functionality.
After installation, replace the side panel of the computer case, reattach any screws, and reconnect the power. Upon restarting, enter the BIOS or system setup to verify that the newly installed RAM is recognized by the system. If the RAM does not appear, check the connections and seating once again. Following these steps will facilitate a successful RAM upgrade, allowing your desktop computer to perform at optimal levels.
Step-by-Step Guide to Installing RAM in a Laptop
Installing RAM in a laptop involves a process that is somewhat different from that of desktop computers. Due to the compact nature of laptops, space constraints and design intricacies can present unique challenges. However, with careful attention to detail, this upgrade can enhance your laptop’s performance. Here is a step-by-step guide to help you through the process.
First, ensure you have the necessary tools for the task. A Phillips-head screwdriver and anti-static wrist strap are recommended to prevent any damage from static electricity. Before you begin, turn off your laptop and unplug it from the power source. In addition, remove the battery if your laptop model allows for it. This precautionary measure helps avoid any electrical shock or damage during the installation.
The next step is to locate the RAM compartment, which is typically found on the underside of the laptop. Most laptops have a dedicated cover for easy access, while some may require you to remove the entire bottom panel. Carefully unscrew the cover and set it aside. Once you have access, identify the existing RAM modules and observe how they are seated. If no RAM is currently installed, you can skip to the next step.
To insert the new RAM, gently push the existing modules outward, releasing them from their slots, if necessary. Align the notches on the new RAM sticks with the slots in the motherboard and insert them at a 30-degree angle. Press down firmly until they click into place. Ensure the modules are secured in their slots, as a loose connection can lead to performance issues.
After successfully installing the new RAM, replace the compartment cover and screws. Reinsert the battery if applicable and plug your laptop back into the power source. Upon restarting, enter the BIOS or system settings to confirm that the new RAM is recognized and functioning correctly. With these steps completed, your laptop should exhibit enhanced performance, making your upgrade worthwhile.
Testing Your New RAM: Confirming a Successful Installation
Once you have physically installed the new RAM modules into your computer or laptop, it is essential to confirm that the system recognizes the new components and that they are functioning correctly. Performing a series of tests will help ensure the successful installation of RAM, and there are several methods to achieve this on both Windows and macOS platforms.
Firstly, on a Windows system, you can utilize the Task Manager. Right-click on the taskbar and select “Task Manager” from the context menu. If the Task Manager opens in a compact view, click the “More details” option at the bottom. Navigate to the “Performance” tab and select “Memory” from the left sidebar. Here, you will see an overview of your RAM, including the total amount installed and the amount currently in use. If the total memory displayed matches the expected total after your upgrade, the installation has been recognized by the system.
For a more in-depth analysis, you can run the Windows Memory Diagnostic tool. To do so, type “Windows Memory Diagnostic” in the Start menu search bar and select it. Choose the option to restart your computer and check for problems. Upon rebooting, the tool will automatically run tests on your RAM, providing results on any potential errors.
For macOS users, you can check the installed memory through the “About This Mac” feature. Click the Apple logo in the top-left corner of your screen and select “About This Mac.” In the overview window, you will see your Mac’s memory specification. If the new RAM is shown correctly, then it has been successfully installed. For further testing, you can also use the “Activity Monitor” found in the Utilities folder. Navigate to the Memory tab to view the memory usage and performance of your system.
Moreover, running benchmarking tools like Geekbench or UserBenchmark can provide comprehensive insights into the RAM’s performance, revealing any improvements in processing speed and system responsiveness.
Troubleshooting Common Issues After Installing RAM
Upgrading RAM can significantly enhance a computer’s performance, but it may also lead to some unforeseen issues. If your device fails to boot or experiences instability following a RAM installation, the problem may stem from a few common factors. First and foremost, ensure that the new RAM modules are correctly seated in their slots. Improperly installed RAM is one of the leading causes of boot failure after an upgrade. To verify this, power off your system, disconnect it from the power source, and remove the RAM sticks. Reinsert them firmly until you hear a click, indicating they are secure.
Another potential issue is compatibility. Not all RAM is suitable for every motherboard. It is crucial to check that the newly installed RAM specifications match your motherboard’s requirements, including speed, type, and capacity limits. Refer to the motherboard’s manual or the manufacturer’s website for detailed information on compatible RAM. If you have mixed RAM types, consider running a standard configuration, as having different speeds or timings may lead to issues such as system crashes or instability.
Occasionally, an upgrade can trigger issues with system performance, and it might not provide the expected boost you sought. In such cases, updating the BIOS may resolve performance discrepancies. Manufacturers often release updates to enhance RAM compatibility and stability. Additionally, running a diagnostic tool can help assess whether the new RAM is functioning correctly. Programs like Memtest86 can detect errors and evaluate RAM integrity.
In summary, when troubleshooting RAM-related issues, always check for proper seating, compatibility, and BIOS updates. These simple steps can often alleviate many of the problems encountered after upgrading your computer’s memory, ensuring that you can fully enjoy the performance benefits that come with additional RAM.